Sunday, April 17, 2016

Country Roads

My parents have some land out in DeLeon, TX and built a "barndominium" to stay at when we all go out there.


We also took our engagement pictures here!
With land, comes animals--turkey, armadillos, jackrabbits, hogs, coyotes and, of course, deer.  We found an old deer skull while riding around on the Polaris and I decided to jazz it up a bit!

The skull had been out in the elements for quite some time so not too much cleaning was necessary--really just to get the dirt and grass out of it; but, just to be safe, I went ahead and bleached it for several hours.  Once it was dry, I could begin!  My mom's friend sold me a ton of beads and I had just enough turquoise to cover the entire skull!  I ended up just hot gluing the beads on since I misplaced my bead glue.  Other than a few stray glue-strings I think it turned out really great!

Dining Room Tablescapes and Banners

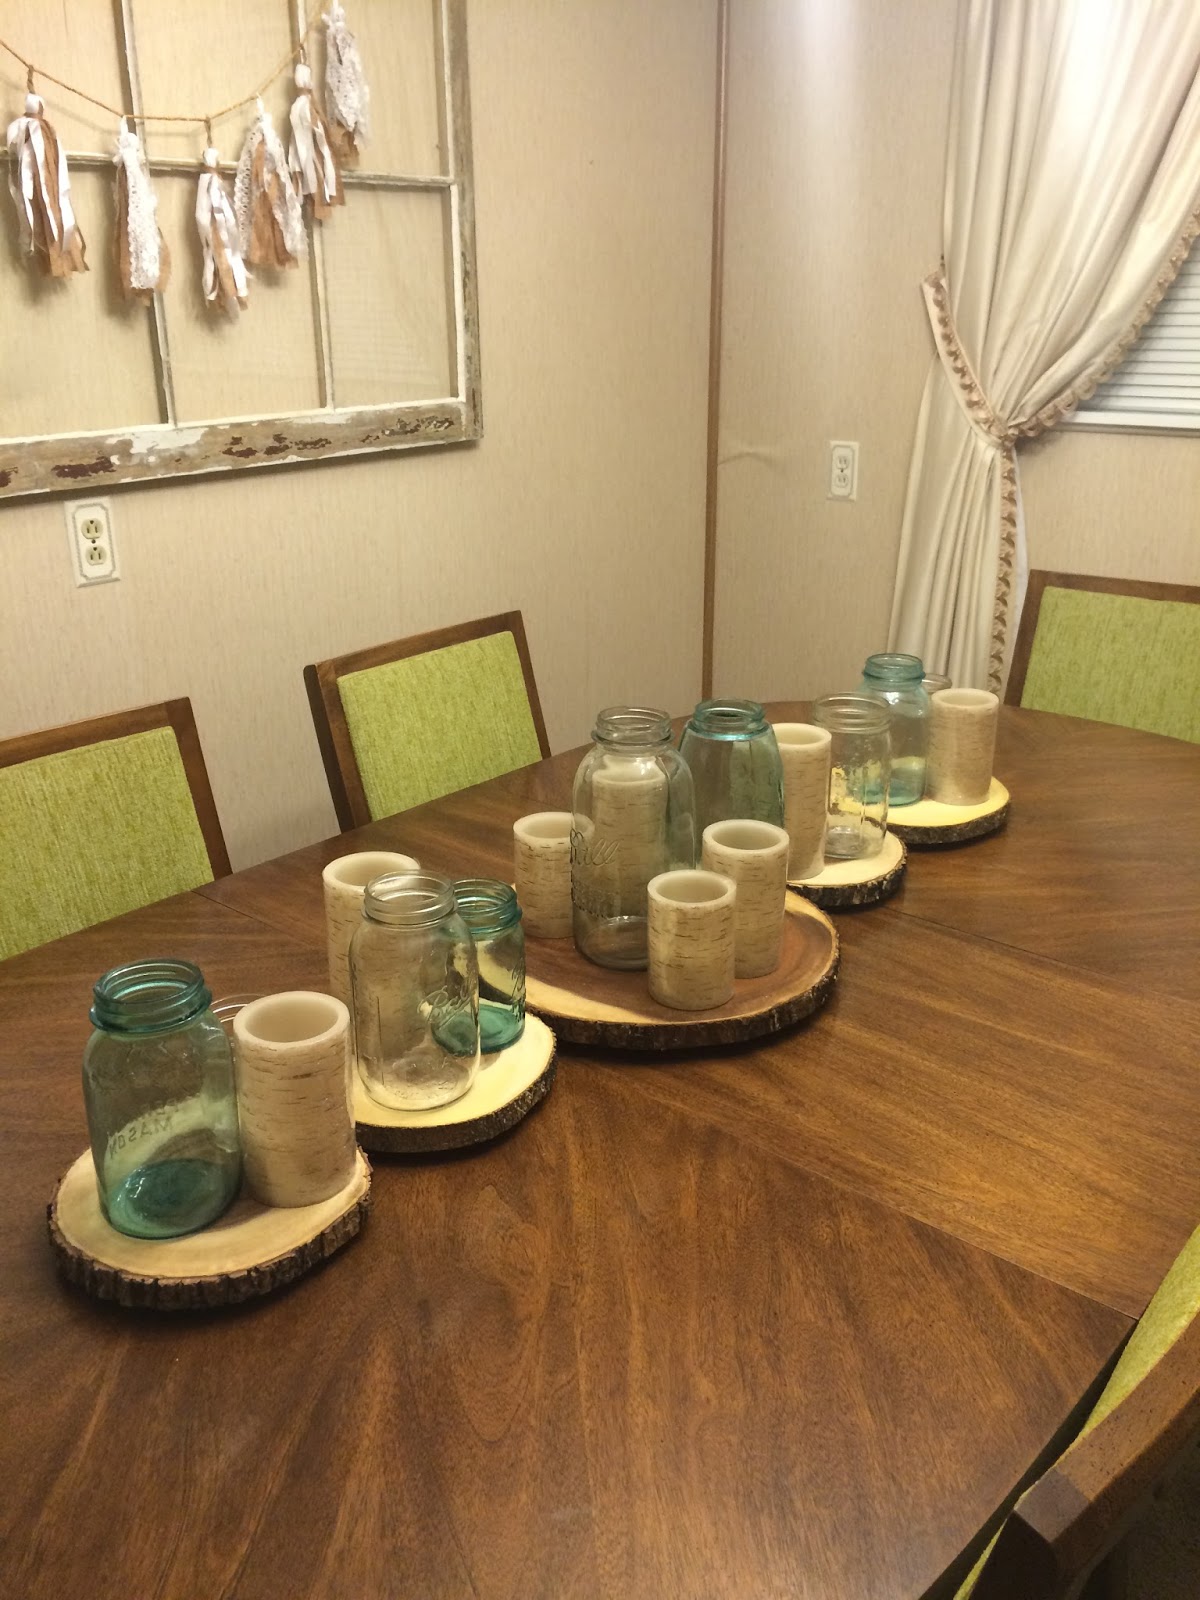
When we first moved in to our house, one of the first things I looked forward to doing was decorating our dining room table with cute, seasonal tablescapes.  Here are a few I've had over the past few months! (I do have to ask that you ignore the pea-green chairs...the plan is to reupholster them but we just haven't gotten around to it.)


This has been my staple centerpiece for the past several months.  We registered for the wooden slabs for our wedding and were blessed with extras!  I'm definitely not complaining because I think it worked out perfectly!  I got some of the mason jars from my friend who let me have some for my wedding, and a few were found in my grandparent's garage after we moved in.  I also LOVE these candles.  It's hard to tell, but they look like faux-wood and actually have a remote so I can turn them all on with one click!

Can you guess which season I used this centerpiece for? *DING DING DING*--Fall is the correct answer.  I bought two leafy garlands from Michael's and bought a few decorative pumpkins from the grocery store.  My red vase just helped pull the red into the scene.

I LOVED my Christmas centerpiece!  I bought the old springs from an antique store in Granbury not knowing exactly what i was going to use them for.  Thankfully I was able to find something to do with them or my husband might have killed me for buying rusty springs!  I simply stuck some candles in the middle and helped keep them straight with little winter-y sprigs from Michael's!  The banner hanging up behind it was made from sparkly snowflake ornaments!

First of all, I forgot to take a picture of the tablescape for Easter.  Just imagine my first picture with the mason jars plus different sizes of colorful glass-mirrored eggs. :)  Second, the banner itself came fro m Kirkland's and was like $5.00 after Christmas.  What a deal!  The cute little carrots were found at Target and, with me being a registered dietitian, I couldn't pass them up!

Sunday, March 27, 2016

Up-cycled door

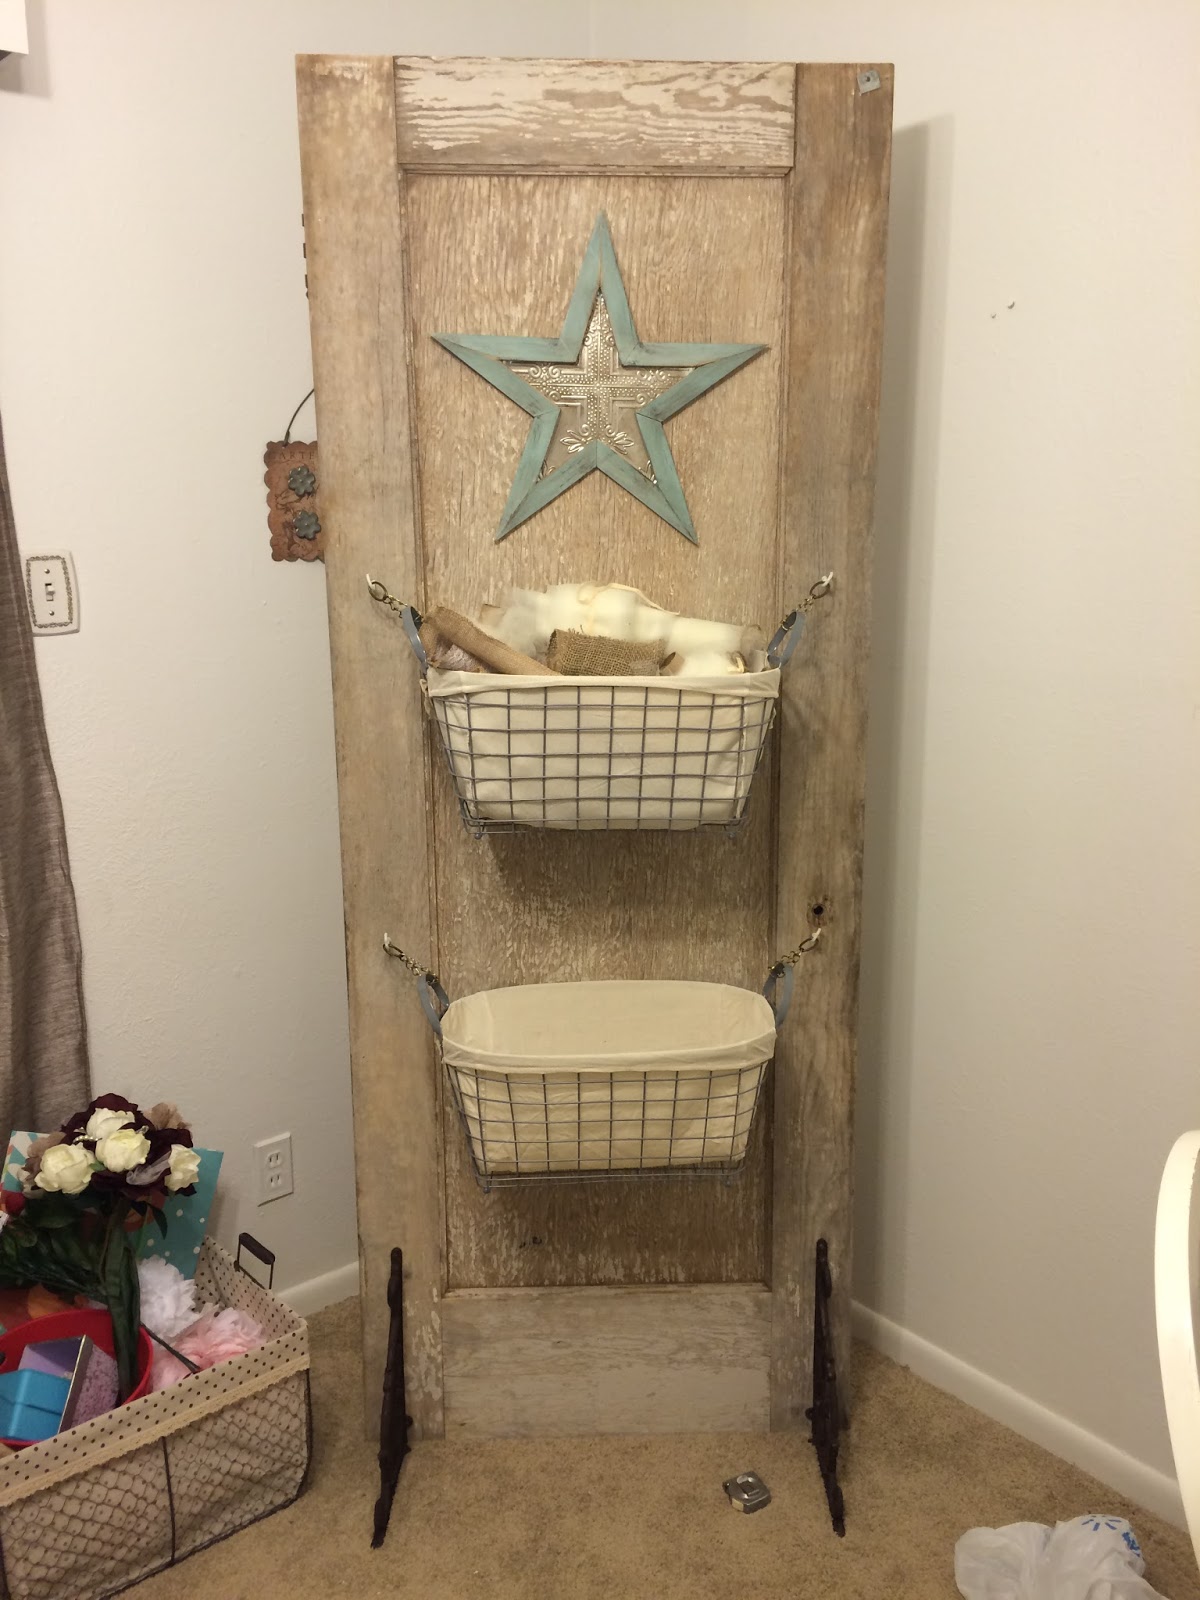
Last year I made a decision to trade my little car for my parent's Tahoe.  It wasn't just because the "truck" had less miles or that it didn't have all the little clicks and pops that my car had, but mainly because it had more space for me to crate around large crafting items or antiques.  Specifically old doors that  I was wanting to bring back from my husband's house in college.  

Alex's roommate was planning on throwing the old doors out until I claimed them!  Unfortunately, two of them were too far gone-covered in termites and completely cracked in half and falling apart.  The third was still in tact so I rescued the doorknobs off the others and brought back the last to up-cycle it!

I decided to use it as additional craft storage in my craft room!  I bought a couple baskets from Tuesday Morning and found the shelf brackets that I used for legs on sale at Home Goods (very lucky!).  Hope y'all like it!


Wednesday, March 16, 2016

Hawaiian Honeymoon

It's been quite some time since I've posted and there are several new crafts to update on the blog!  I'll split them up into different posts, so for now, here are a few crafts I made with the sand from our Hawaiian Honeymoon!  We honeymooned in Kauai and it was amazing! 


Christmas Ornament with sand and seashells off the beach of Kauai!
We took a cruise of the Napali Coast in Kauai and it was beautiful!  I put a postcard into a shadowbox and added some sand and seashells from the beach!  Perfect for my beach themed bathroom!

Sunday, October 4, 2015

Wedding DIYs

This is going to be a long one!!  

The wedding is finally over!  It was a stressful, exciting, amazing day, but I'm glad it's over and I can finally call Alex my husband!  We had a wonderful honeymoon and we've finally moved in to our house!  Without further adieu, it's finally time to to share all of my DIY projects for the wedding!

To start--you can't have a wedding if you don't invite people, right?  So, after figuring out what I wanted to do and seeing how much the pre-made, ordered invites actually were, I decided to make my own.  I've seen it a lot on Pinterest and it really wasn't too hard.  So I went to Hobby Lobby and bought some card stock, twine and glue dots, then ordered doilies from Amazon and got to working!  While I found doilies at other stores, they weren't as intricate as I liked.  I made the outline on Microsoft Publisher and used our printer's photo printing option to print them off in the correct size.  The information cards are made from the same cardstock, just cut smaller!
Finished product!  It took quite a long time, but I love them!
One of the next things that had to be done was to pop the question to my bridesmaids!  I knew I wanted to make something that the girls would wear to the wedding.  So, I found these cute little lockets on Etsy (shop: BrassKicker) and bought the pearls, chain and clasps from Hobby Lobby/Michaels and put it all together!  But what to put it in?  I bought these little glass tubes and dresses from Michael's and added a hook onto the cork and put the necklaces in them!

My most favorite project was definitely my bouquet.  I always knew that I wanted something different that involved using antique brooches.  I have been eyeballing the fabric flower and brooch bouquets for years, only to realize that they can cost just as much (if not more) than real flowers.  SO, I decided to make my own.  I used a lot of different types of fabric flowers from almost anywhere you can imagine...Michael's, Hobby Lobby, and even Marshall's and TJ Maxx. 
 I bought way more than I needed because I wasn't sure what all I wanted/needed or what would look best.  The individual flowers were mostly hair clips which made it very easy to attach them to the bouquet.  I used wire to wrap the non-clip flowers and attach them to the base.
I used the flower ball as a base.  The peony bouquets were obviously used as the stem handle. 
I pinned the brooches to my favorite flowers and then just started clipping/wrapping the flowers onto the flower ball!
At the end, I wrapped some twine around the "stems" to complete the handle.
Finished product!!!
I also wanted to add something special...
For the family members that couldn't be there on our big day, I had them with me the whole time!

While we are on the topic of flowers--I made the guys their boutonniere, too!  Since we got married in a barn, we wanted something country-esque.  So, what better than bullets?  I glued the pins to the bullets and wrapped them with a little bit of lace.  I bought the flowers from JoAnn Fabrics and just shoved them into the bullets and there you have it!

The wood tags were bought at a boutique store and I wood burned their names onto them! 
I also made the mom's and grandmother's corsages.  Very easy, just bought the pearl bracelets and glued the flowers (from Michael's) onto ribbon wrapped around them!

We planned to use a wood slab for our cake topper, but didn't end up using it because it had flowers on top!  I used my woodburner to make the B.

Gifts!  Of course I had to include a little DIY into the bridal party's gifts! 
Woodburned the bridesmaid's names into the wood slabs for their hangers (which were purchased from TJ Maxx)
This is what the tags from the previous picture ended up being used for!
A few of my favorite decor pieces were these old windows and shutters that I bought from various antique shops!
Thankfully the panes were about the same size as a piece of printer paper, so I just printed out what I wanted to say and wrote over it with a chalk pen. Made it look very nice since my cursive is not great!
Please ignore the off-center picture...it fell off during the move and was just quickly stuck back on!
This was one of the most time consuming projects I took on...When I originally bought this, it was just the frame.  SO, I added the chicken wire to hang the pictures on.  Since our lovely staple gun was not working (and probably wouldn't have worked well anyway-it would need very small staples), I had to use thumbtacks to attach it.  Also, have you ever worked with chicken wire?  It hurts.  But the end result was work it :)
 For the favors we had wildflower seed bombs!  I bought the seeds off Etsy (shop: FreeMountainDesigns) and used the leftover cardstock from our invitations!  Hot gluing was the easiest way to attach them since they weren't completely flat on the back :)  Apparently they work, too, because Alex's work family had planted theirs while we were on our honeymoon and they already started growing after a week!

Based on the Etsy shop's included instructions!

We decided to do the "cord of 3 strands" ceremony.  We had a spare piece of wood that we stained and I used painter pens to write the verse on.  We bought the rope from Michael's and drilled two little holes in the back to attach it with wire.  It turned out well and can now be a very meaningful piece of decor in our house! 
If you or anyone you know want to do this, THIS is the reading we gave our officiant to use while we braided the cord.


Okay, I think that's actually all!  It was a lot of planning and projects but it was well worth it!!  Hope you enjoyed it all! :)

Thursday, June 25, 2015

Let's catch up...

Wow, has it really been 6 months since I've posted last?  So much has happened since then!  I got engaged, one of my best friends got married...okay, so I guess "so much" is the wrong wording...but it's all super exciting and important stuff!  Here's a few things I've been working on these past few months..

I was my friend Kelsey's maid of honor so, along with the help of her other bridesmaids, we put together an awesome Minnie and Mickey Mouse themed bridal shower!

I made the banner with black doilies, scrapbook paper and ribbon!


I used these little notes in a scrapbook I made for the bride that I gave to her on their wedding day!  Unfortunately I didn't get a picture of the book; I'll have to ask her for one when they get home from their honeymoon!

This game is always fun-- "Pin the _____ on the Bride and Groom"  We did this at my other friends wedding with "Pin the Moustache on the Groom"
I've also made two more wedding signs for friends that got married


That's all for now!  I'll post some of the things I've been doing for our wedding in a few days!

Friday, December 26, 2014

A Time for Giving!

Merry Christmas and Happy Holidays to everyone!  I hope everyone had a fantastic day spent with loved ones, good food and presents!  Here are a few of my projects and presents that I used as gifts!

Another bracelet made from and antique piece of jewelry!  This time I used two clip-on earrings to make into a bracelet for myself, and my sister!  Also, I'm obsessed with cameos. :)

So obviously I didn't actually make these.  I just thought it was a very cute way to present gifts to my friends!

Last year I made a graduation tassel ornament for myself (the one on the left) & this year, now that my boyfriend has finally graduated, I made one for him!

This was one of the gifts I made for my boyfriend.  I got this idea from pinterest (of course) and decided it would be a cute way to "wrap" Alex's graduation ornament!  It's called an "exploding gift box" and unfortunately the link on the pin no longer works so I can't share it!  Had I not made this box about two years ago (yeah, I've been saving it for quite some time now...) then I would give more detailed instructions!  Sorry!